
Setup guide
Set up AccessiWidget on your Shopify store.
Follow the Getting started checklist in the app, or work through the same steps here. No theme code to paste for a normal Online Store 2.0 theme.
Open the Shopify listingThe Getting started checklist
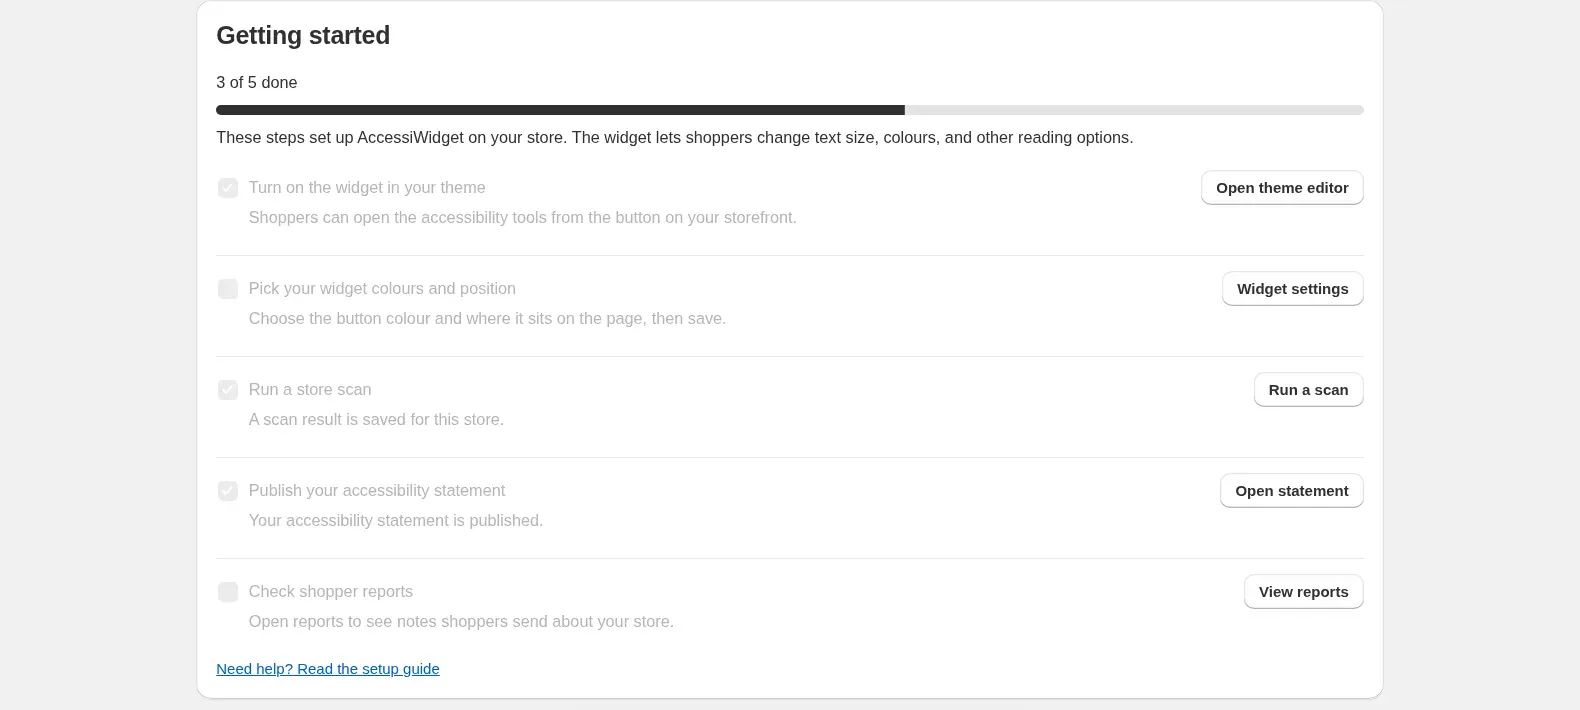
After you install the app, AccessiWidget opens on a Getting started card with five steps. As you finish each one, the checklist marks it done. The footer link Need help? Read the setup guide points to this page.
Install from the Shopify App Store
Open the AccessiWidget listing, choose Install, and approve the permissions Shopify shows for your store. Staff need permission to install apps. You land in the AccessiWidget app when the install finishes.
1. Turn on the widget in your theme
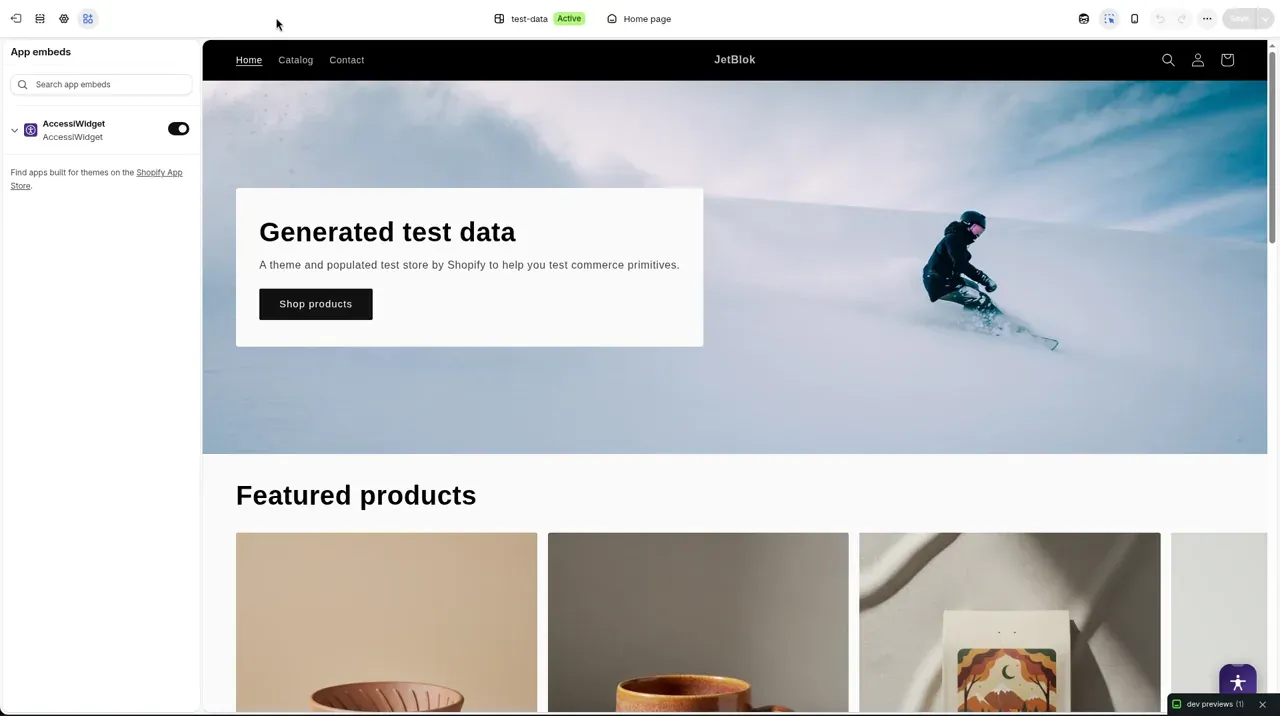
Installing the app does not switch the storefront button on by itself. Shopify leaves app embeds off until you enable them on the theme that is published.
- Go to Online Store, then Themes.
- On your published theme, choose Customise.
- Open App embeds in the theme editor sidebar.
- Turn AccessiWidget on, then Save.
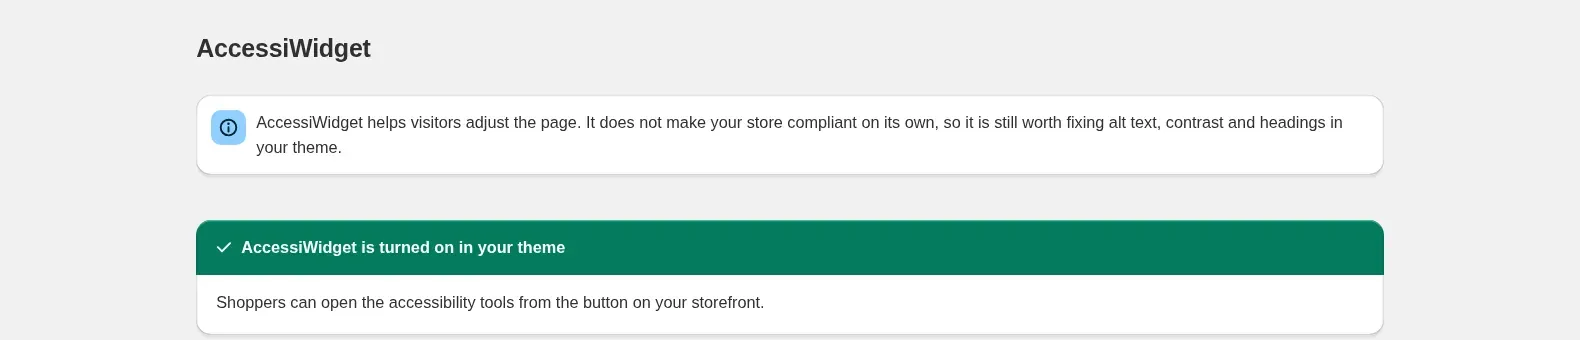
In the app, the Open theme editor button on the first checklist step does this in one click. After you save, shoppers can open the accessibility tools from the button on your storefront.
2. Pick your widget colours and position
Open Widget Settings from the AccessiWidget menu, or choose Widget settings on the checklist. Set the button colour, position and size, and which side the panel opens on, then save. Place the button so it stays clear of chat widgets and cookie banners.


3. Run a store scan
Open Store scan from the app menu, or choose Run a scan on the checklist. The scan looks for common issues on key pages and product images, and lists how to fix them. It is an automated check, not a full audit. Work through the issues it lists. A card such as a missing alt text warning includes an Edit product button that opens the product in Shopify admin.

More detail on what the scan checks is on the store scan page.
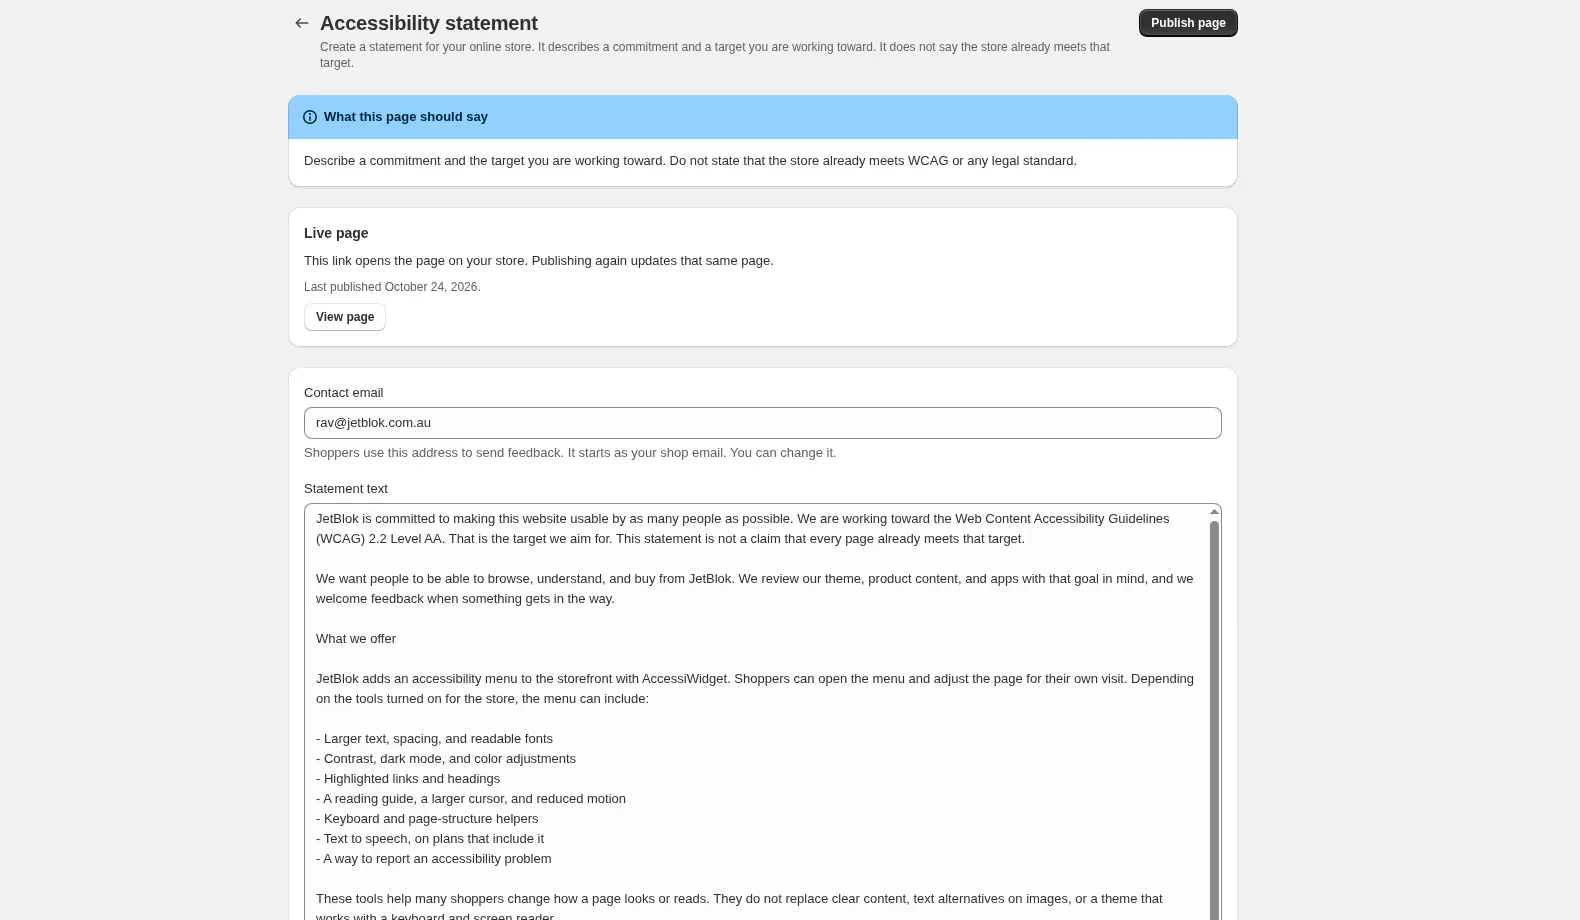
4. Publish your accessibility statement
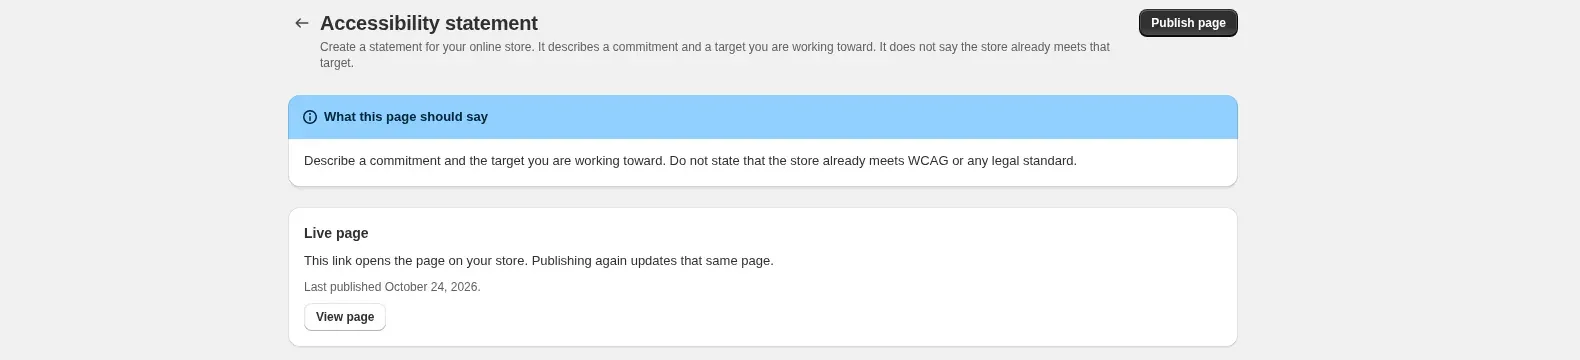
Open Accessibility statement from the app menu, or choose Open statement on the checklist. Review the page, then choose Publish page. A statement should describe a commitment and a target you are working toward. It should not say the store already meets WCAG or any legal standard.
5. Check shopper reports
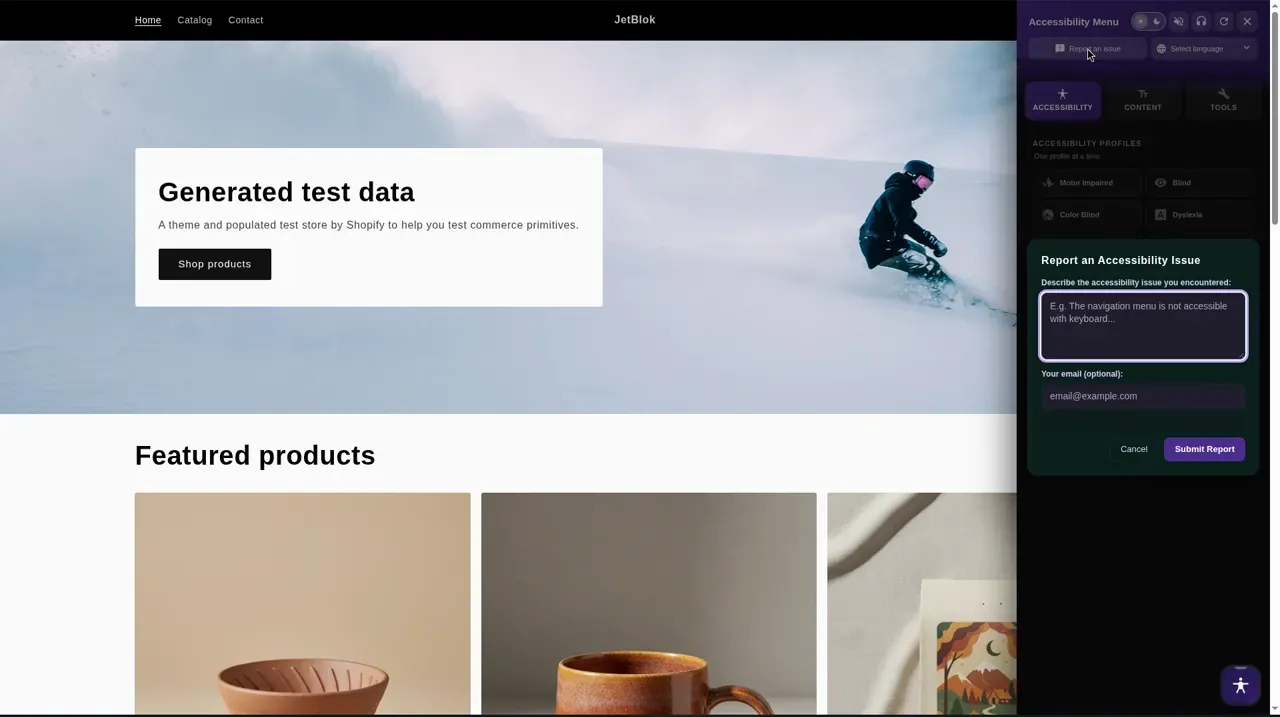
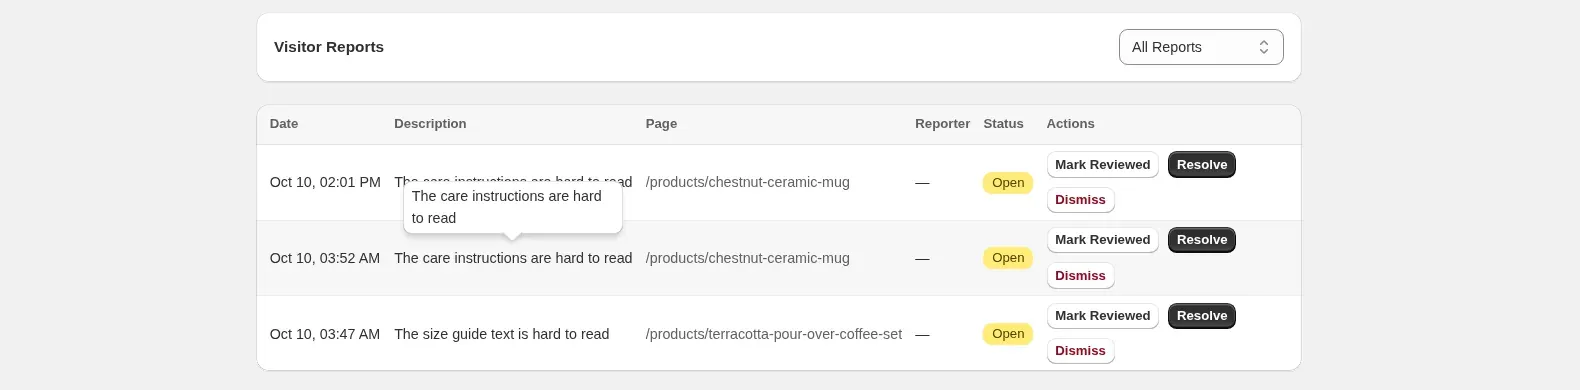
Shoppers can report an issue from the Accessibility Menu. Those notes appear in Reports in the app, under Visitor Reports. Open Reports from the menu, or choose View reports on the checklist, then follow them up.
Plans
AccessiWidget has three plans: Free, Starter and Pro. Free includes the core shopper tools, a store scan, an accessibility statement page and the Reports inbox. Starter adds text to speech and more reading tools. Pro adds voice navigation. Paid plans include a 7-day trial.
The full feature list and current terms are on the pricing page and the Shopify App Store listing.
FAQ
The widget is not showing on my store
Open your published theme in the theme editor, turn the AccessiWidget app embed on, then Save. Refresh the storefront, or try a private window so a cached page is not hiding the button. If the store is password protected, enter the password so the published theme can load. If you have just published a new theme, turn the embed on for that theme and save again.
Which plan has what?
The Free plan includes the core shopper tools, a store scan, an accessibility statement page and the Reports inbox. Starter adds text to speech and more reading tools. Pro adds voice navigation. Paid plans include a 7-day trial. See the pricing page for the full feature list.
More questions are answered on the FAQ page. For help, email [email protected].
This page is product help, not legal advice. AccessiWidget helps you work toward WCAG 2.2 and ADA and reduce accessibility barriers. It does not make a store compliant, and it does not replace work on your theme, content and checkout.